I have seen a few questions regarding if Azure AD Domain Services supports Remote Desktop Services (RDS) licensing services.
These questions mostly are around whether or not Per User license auditing reports are supported as this requires AD user attribute updates when the RD Licensing Server issues a per user CAL to the user. In Azure AD Domain Services user writes are only allowed from Azure AD itself, not within Azure AD Domain Services (where the user objects are read only).
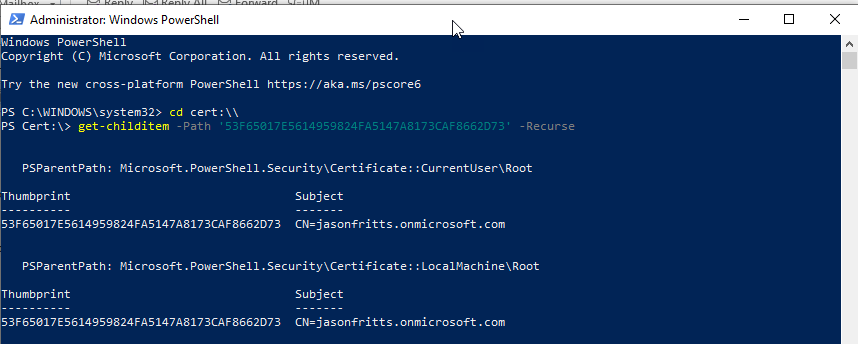
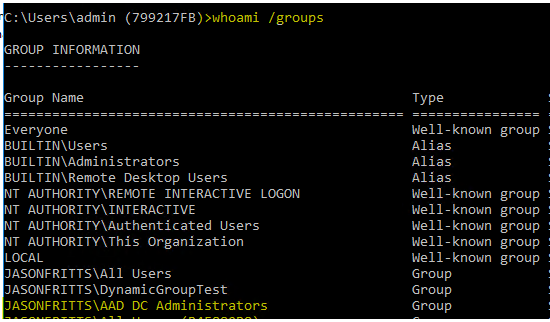
This process IS supported as long as the administrator installing the Remote Desktop Licensing server role on the Windows Server host is a member of the Azure AD group “AAD DC Administrators” when they are installing the Remote Desktop Licensing server role. You can verify membership from within your AAD DS joined workstation with cmd:
whoami /groups
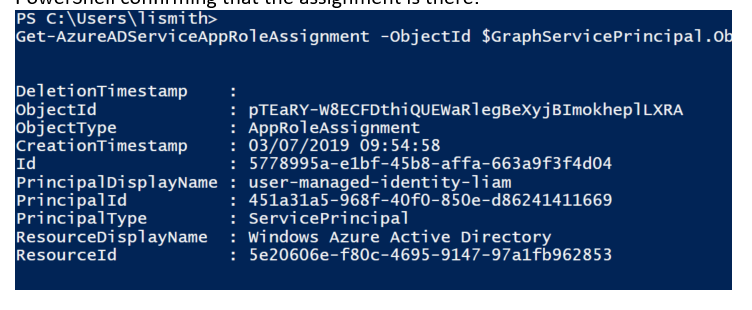
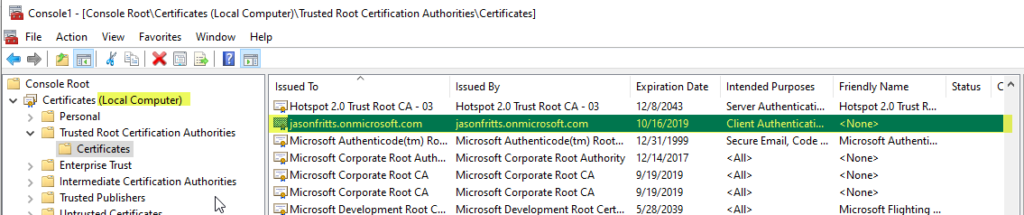
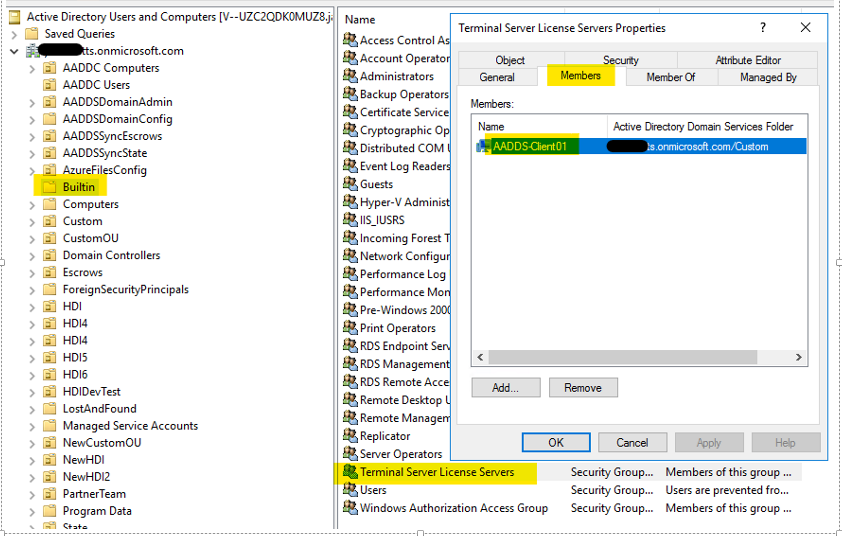
Once you have verified membership in “AAD DC Administrators”, after installation of the Remote Desktop Licensing role, you should find that the server’s Windows AD computer object has been added to the “Terminal Server License Servers” security group as shown below:
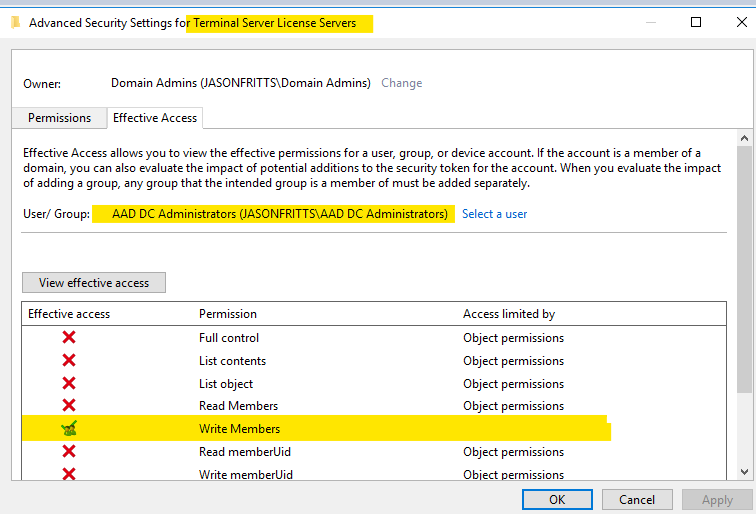
If this is not the case, verify that the security permissions on the “Terminal server License Servers” group show that the “AAD DC Administrators” group has the effective permission “Write Members” as shown below:
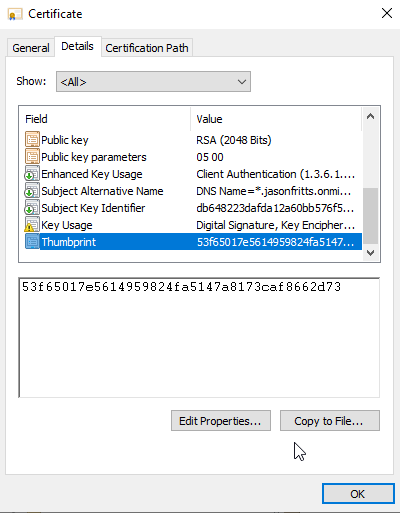
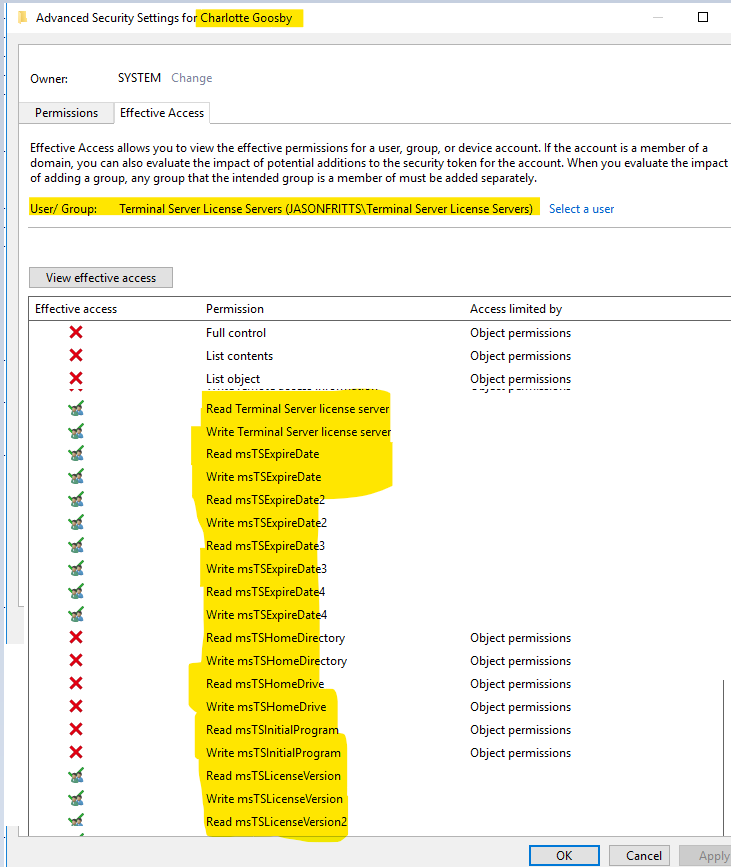
And on a user within AADDC Users OU, view security effective permissions for the Terminal Service License Servers group and verify it has read\write permissions on the following msTS user attributes shown below:
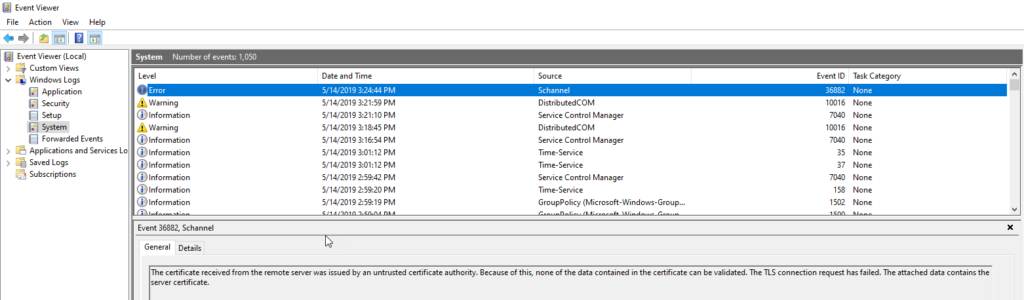
If you do not see this ACL entry for Terminal Server License servers, you should open a support case as this would be unexpected behavior. If the Remote Desktop Licensing Server computer object is not a member of the “Terminal Server License Server” group then you may find the following error in your Event Logs:
Log Name: System
Source: Microsoft-Windows-TerminalServices-Licensing
Event ID : 4105
Level: Warning
User: N/A
Computer: <computer name>
Description:
The Terminal Services license server cannot update the license attributes for user <user name> in the Active Directory Domain <domain name>. Ensure that the computer account for the license server is a member of Terminal Server License Servers group in Active Directory domain <domain name>.
If the license server is installed on a domain controller, the Network Service account also needs to be a member of the Terminal Server License Servers group.
If the license server is installed on a domain controller, after you have added the appropriate accounts to the Terminal Server License Servers group, you must restart the Terminal Services Licensing service to track or report the usage of TS Per User CALs.
Win32 error code: 0x80070005
Once computer membership in Terminal Server License Servers group has been confirmed, you should find no issues tracking Per-user CAL issuance in RD Licensing Manager:

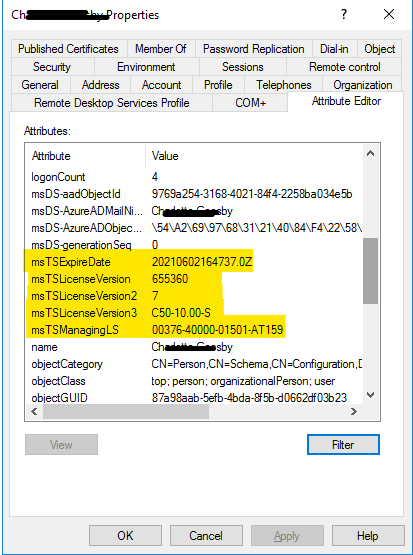
Viewing any user’s AD attributes after they were issued a per user CAL should show that the necessary license tracking has been successfully written to the user in Azure AD Domain Services:
A Per-user CAL license report should also successfully list these users:

I hope this clears up any questions around the compatibility